You may already know that concrete slabs are one of the most affordable choices for foundations, but did you know that they are also incredibly durable when poured correctly?
If you’re wondering how to pour a concrete slab, then you came to the right place!
Join us while we cover all the important things there are to know about pouring a concrete slab and why it may just be the perfect foundation for your next project.
Planning for Your Concrete Slab
Whether you’re planning on pouring a concrete patio slab, a stair landing, or a foundation for your shed or garage, proper planning can save you time and money in the long run.
Several factors to consider when planning for your concrete slab are:
- placement
- size
- how much weight your concrete slab will need to support
- what tools will you need to complete the job
It’s important to consider things like the size and how much weight your concrete slab will need to support because these things will factor into determining the overall concrete slab cost. Placement is also a very important factor; making sure to consider things like underground utilities when digging and your local building codes.
Marking off Space for Pouring a Concrete Slab
Once you’ve determined where you want your concrete slab, it’s time to roughly mark off the space with some chalk or twine. You’ll want to use a square to make sure that your lines are nice and straight before you drive your stakes into the ground.
Once you have your rough markings done and are happy with the placement and position, it’s time to drive your stakes into the ground at the four corners where your slab will be. Drive them in with a hammer so that they are in firmly enough that they won’t get knocked over easily. Now you will want to string twine around your four stakes to mark off the perimeter of the area where you will be pouring a concrete slab.
Digging Your Hole
Now that you have your space marked off, it’s time to dig a hole to pour your concrete into. This hole should be dug with a uniform depth, have a flat bottom, and straight sides. The depth of your hole should be between 4 and 6 inches, but this will vary slightly depending on the desired thickness of the concrete slab to be poured.
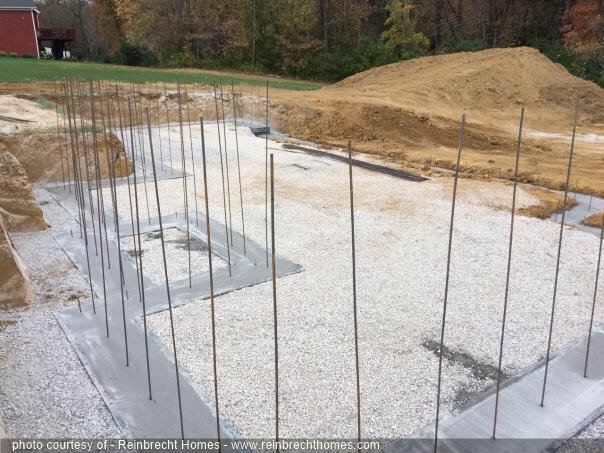
Adding a Layer of Gravel
Adding gravel to the bottom of your hole will provide drainage and a good sub-base for your concrete slab. You will need to add several inches of gravel into your hole to provide a good stable base for pouring your wet concrete.
Once you’ve poured the gravel in, you need to use a tamper tool to make sure that it’s compacted and flattened down.
Building a Slab Form
The slab form will be what you pour your wet concrete into. This form will create the shape for your slab and keep everything together while your concrete dries.
To build your slab form you will need to cut lumber into the length and width of your concrete slab dimensions and then nail or screw it together. Be sure that your corners are square so that your slab doesn’t skew.
Once you’ve built your form, you need to place it into your hole and stake it down into place at the corners. You can use four pieces of 2-by-4 lumber sharpened at one end and driven into the ground at each outer corner of your form for this. Screw or nail the form to the stakes to hold everything in place.
Mixing the Concrete
If you are mixing your own concrete by hand you will need to empty a bag of concrete into your wheelbarrow and mix it with water according to the instructions on the bag. You will use a hoe or a shovel to stir the concrete until it reaches an even consistency.
Keep your hose handy! You will need to wet down your base, your form, and your tools before you start pouring.
Pouring the Concrete Slab
We are finally to the stage where we can get the concrete into this hole, but remember that concrete dries quickly, so you need to work fast! Ideally you will have several people working at once during this stage to make sure that you have time to get the concrete into the hole and spread out before it starts to harden at all.
You can use a shovel or a hoe to spread the concrete around evenly and get it into all the corners.
Screed the Concrete Slab
Screeding the concrete slab is an essential step. Screeding is a technical term for leveling out and smoothing the top of your concrete slab. This process will give you that smooth finished look that you want when your slab is complete.
Using a 2-by-4 inch straight piece of lumber you can draw across the top of your poured concrete slab to smooth and flatten the surface. Do this as many times as it takes to get the surface level and smooth.
Floating and Curing
Once the concrete has had time to settle and you see that the water on the surface of your concrete slab has started to evaporate, it’s time to smooth and compact the surface with a concrete float.
Follow the manufacturer’s instructions for allowing your concrete slab to cure completely. Sometimes the concrete will need to be kept moist during this process to prevent cracks from forming.
This would also be the time to apply finishes to your concrete slab if you were going to do so.
Now You Know How to Pour a Concrete Slab
We hope that you enjoyed learning all about pouring a concrete slab with us! Concrete slabs are one of the best and most durable foundations around, and come with the added bonus of being very affordable!
If a concrete slab sounds like the right choice for you, get in touch with our team to get a FREE quote!